Wednesday, April 27, 2011

Bridal Shower Cupcakes


Well, I put together a bridal shower for a dear friend getting married in June and I got a great idea for some fun decorative cupcake toppers.  I wanted to try something different, unique and elegant for the special ocassion. 

These were really simple to make, but time consuming. 
You can get everything you need from your local .99 cents store - get crafty people!

Here's what you need to get started:

• 1 sheet of 8.5"x11" card stock
• 3 sheets of matching 20"x20" tissue paper
• 3 ft of 1/4" ribbon
• 12 toothpicks
• Double stick tape
• Cuticle cutters (you know the little 2-prong fork thingy that comes in manicure sets)
• self-adhesive Pearls (optional)
• and a bodice or tank top template (I just drew my own)


Here you can find a step by step on how to create these cutesy toppers and there are even a few videos, which I encourage you to watch, it makes it all come together..

It was extremely time consuming, but WELL worth it!


Everyone removed their "little bride" and saved it as a momento..........
before they devoured those mini dark chocolate coconut dreams :)


Friday, April 22, 2011

Seedling Update


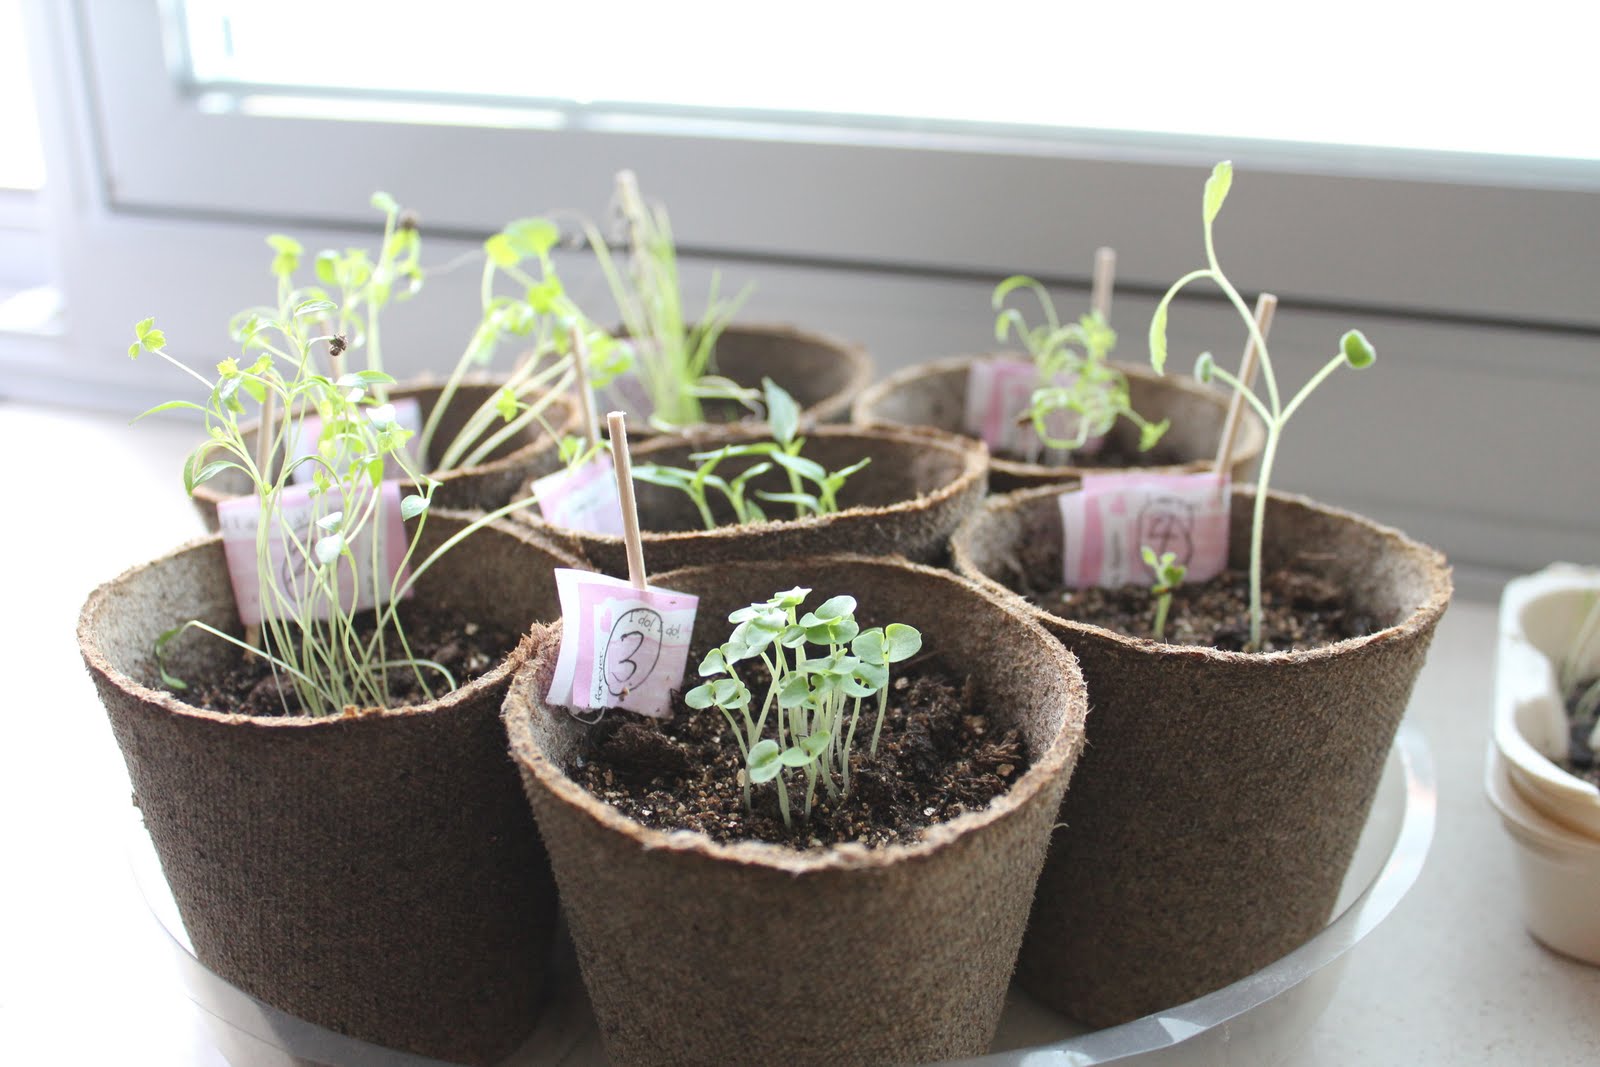
This is just a quicjk update, so you can see the progress of my herb garden.

I am so shocked that these little guys are growing!! 

Fresh Cilantro

Sweet Mint

Mmmmm Basil

Please come back in less than 2 weeks to see how it goes with our  
very first Brooklyn Seedling Swap!
Italian Parsley

Monday, April 11, 2011

Seedling Swap

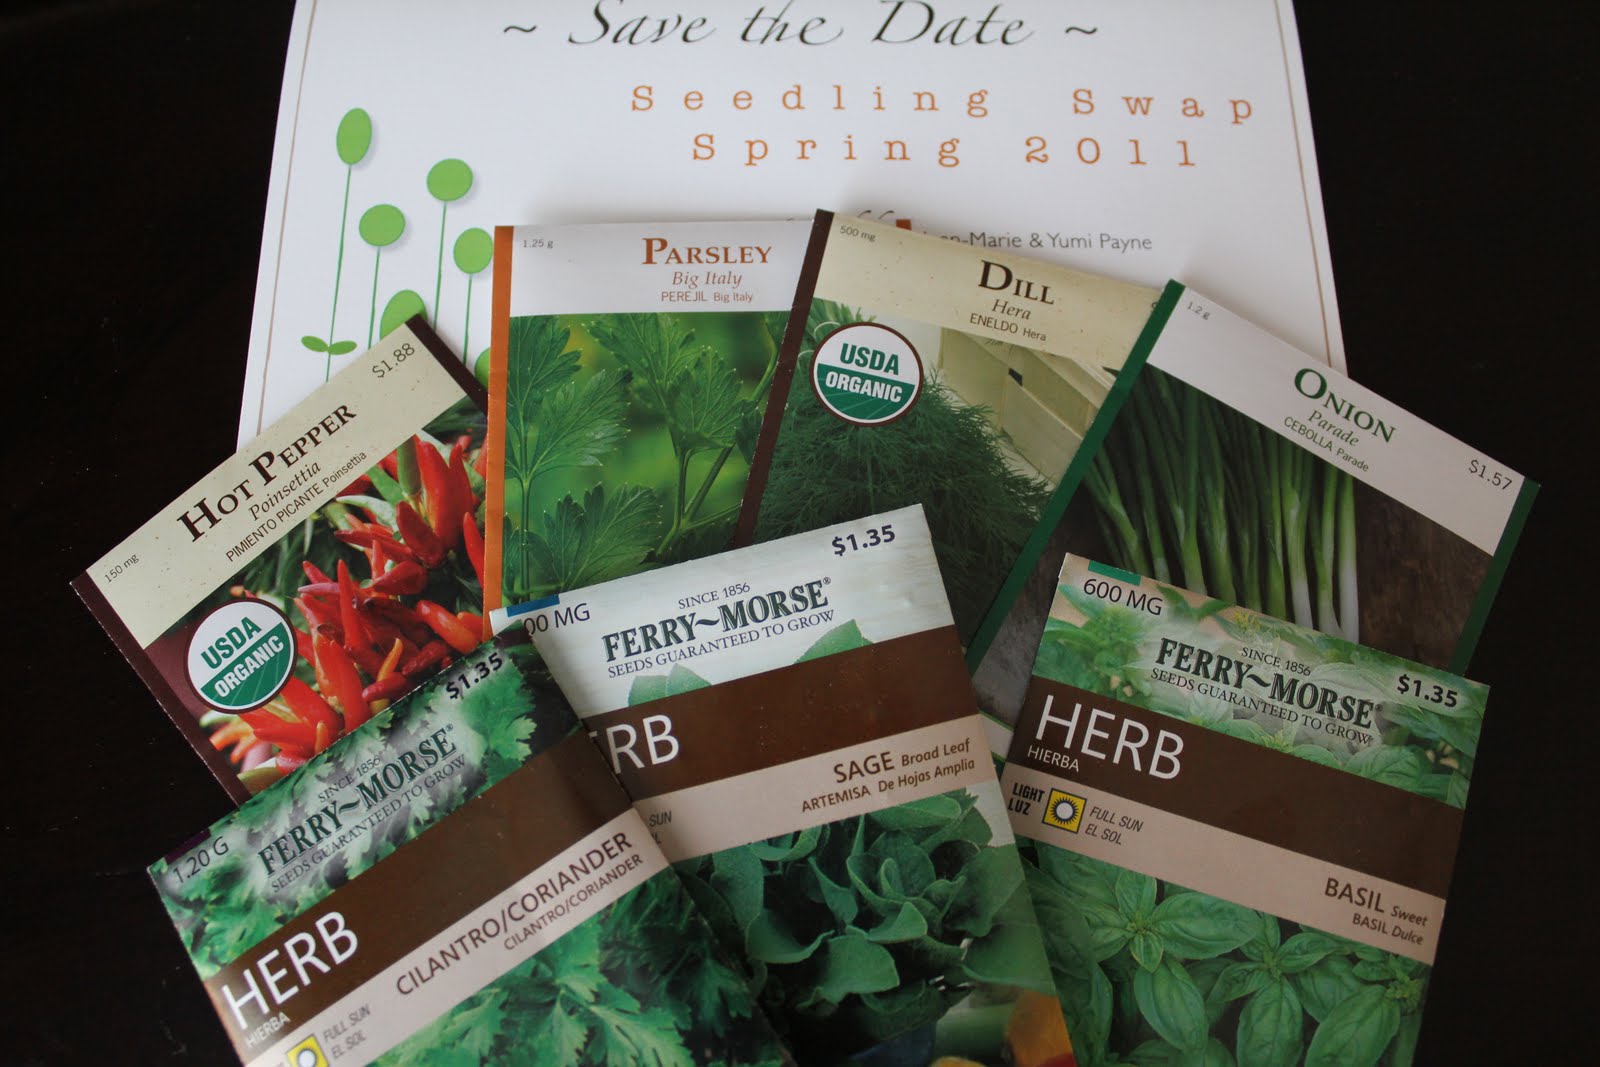
I'm so excited that my great friend Yumi has put together something they call a "seedling swap" it's where friends & fam get together and share what they plan on growing in their very own home gardens.
Yummy! Well, in an atetmpt to live vicariously through anyone living on the west coast I begged her to be involved!
I know, NYC herb garden - and how???

Well, I did some research and with their help and support I was able to get my very own herb garden started

So, I bought my soil (dirt as I so called it to the friendly man that assisted me at Loews :). And these little pots.  In addition to the 4 packs of seeds Yumi placed in my little "seedling swap package" I purchased a few more and I was ready!

Now it's all about the waiting.......I'm so impatient!  I think the poinsettia chili peppers will take the longest to sprout at 14-21 days!!  Ahhhhh!  I can't wait though.  I'll keep you all posted!!

Saturday, April 9, 2011

Fun Friday!!

It's back!  This week we tried Doughnut Holes!  Awesome, right!!  Yum!  It is still cold in this part of the country so we had to do a little something to give you that warm cozy feeling :)
I loved just the plain ones sprinkled with cinnamon & sugar!  Hmmmmm
This was welcome by the whole Infirmary crew!


The choices are endless to what you can create!  Just look in your pantry and be creative!  I'm sure you can come up with some good combinations.  Fry up some sweet goodness!


Doughnut Holes

Ingredients:

  • 1-1/2 cups all-purpose flour
  • 1/3 cup sugar
  • 2 teaspoons baking powder
  • 1/2 teaspoon salt
  • 1/2 teaspoon ground nutmeg
  • 1 egg
  • 1/2 cup milk
  • 2 tablespoons butter, melted
  • Oil for deep-fat frying
  • Confectioners' sugar
 Directions
  • In a large bowl, combine the flour, sugar, baking powder, salt and nutmeg. In a small bowl, combine the egg, milk and butter. Add to dry ingredients and mix well.
  • In an electric skillet or deep-fat fryer (wish I had one of these :) or maybe it's better that I don't!), heat oil to 375°. Drop dough by heaping teaspoonfuls, five or six at a time, into oil. Fry until browned, about 1-2 minutes, turning once. Drain on paper towels. Roll warm doughnut holes in confectioners' sugar, cinnamon & sugar, shredded coconut, vanilla glaze, chocolate ganache, sprinkles, powdered cocoa, or whatever tickles your fancy. Yields: about 3 dozen. 

Try out the recipe and let me know how you like it!

Saturday, April 2, 2011

Spring Baby Shower

 So, here's to the first of my events and goings on of Spring and Summer.  This was for a dear friend who is leaving Bethel for their new assignment as...... Parents!  Exciting! 
We had an intimate baby shower for her and these were the little confections I came up with.  Everyone figured out they were "ducks" but had a hard time deciphering the little "lambs" I got puppy and teddy bear most.  But our new Mommy loved them :D

This was the MESSY part!!


How to

• 24 Baked Cupcakes (any flavor) in paper baking cups
• 4 cups White Buttercream (or frosting of choice)
• 2-1/2 cups shredded coconut
• 28 Marshmallows
• 12 Tootsie Rolls
• 48 miniature semisweet chocolate chips
• Yellow, orange and pink food coloring
• 18 wafer cookies

Directions

1. For lamb cupcakes, frost the vanilla or chocolate cupcakes generously with some of the White Frosting and sprinkle with coconut. Place 1 cup of the coconut in a pie plate. Spread 16 of the marshmallows with frosting to coat (MESSY). Roll coated marshmallows in coconut. Place on a waxed paper-lined baking sheet. Place in the freezer for several minutes or until frosting is set. Cut four of the coated marshmallows into three slices each; cut each slice in half for the ears. Set aside.

2. For each lamb cupcake, place one of the whole coconut-coated marshmallows in the center of a frosted cupcake. For ears, attach two marshmallow half-slices on each marshmallow with some of the white frosting. Cut two small pieces from one of the Tootsie Rolls for the hooves. Form a circle with some of the remaining Tootsie Roll to form a muzzle (I think this is where I went wrong with the mistaken identity.....to make the nose - instead of a muzzle - cover a mini chocolate-chip with a dab of pink frosting). Use a knife to score hooves. Attach them to the front of the whole marshmallow with white frosting. Attach two miniature semisweet chocolate pieces for eyes. Pipe pink frosting onto the insides of ears. Attach hooves to the bottom front of marshmallow.

3. For ducky cupcakes, tint the remaining frosting with yellow food coloring. Set aside. In a pie plate toss the remaining coconut with yellow food coloring to combine.

4. Cut each of the wafers in half (I was forced to eat all teh ones that didn't cut exactly in half :D). Spread all of the wafers and the remaining 12 marshmallows with someof the yellow frosting; roll marshmallows and crackers in yellow coconut to coat. Place on a waxed paper-lined baking sheet. Place in the freezer for several minutes or until frosting is set.

5. Frost the yellow cupcakes with the yellow frosting. Sprinkle with some of the tinted coconut. For each duck cupcake, attach a coated marshmallow to the top of cupcake with some of the frosting. Attach two of the remaining miniature semisweet chocolate pieces to each marshmallow for eyes. Create beaks by using a knife to make a slit in each marshmallow and inserting a candy-coated chocolate piece into the slit. Press one cracker half into frosting at back for tail. Insert two cracker halves into frosting on sides for wings. Sprinkle remaining yellow coconut over duckies.

Adapted from Better Home and Gardens Cupcakes

Friday, April 1, 2011

Fun Friday!!!

It's Fun Friday People.....What are you planning? 
Well, in the Infirmary we find that we must do something pretty disconnected from the nature of our work - to get through those last few hours of our Friday. 


For this edition we decided to make peanut butter cups, you heard me!
MOVE OVER REESE's
I found an awesome recipe and adapted it to what we had in our staff kitchen 
and they were they nom nom good!
Try out the recipe

Wednesday, March 30, 2011

Taste Kitchen Tuesdays Lemon Tartlets


I know, I know, it's Wednesday.....

Soooo, I was all gung ho (click for an interesting tidbit about where that expression came from) about making strawberry tarlets today, since "Strawberries are in season" (I just said that in my best Oprah Winphrey announcing something exciting voice :) and low and behold all the berries were gone from the commissary when I went to pick some up today, so all I had left were from the pint I purchased on Monday.  No fear, lemon Curd may be the next best thing!  I was excited to try a lemon curd recipe I found and paired it with my best shortbread for the crust and Yum-O ( I can't impersonate rachel ray, but you know how she'd say it :D).  I topped it off with some fresh whipped cream and half a strawberry :(
The boys ate them up after their meeting tonight...so I guess they are a winner!
Try em out and let me know how you like them.

Lemon Tarlets

Shortbread Crust:


1 cup (130 grams) all purpose flour

1/3 cup (35 grams) confectioners (powdered or icing) sugar

1/8 teaspoon salt

1/2 cup (113 grams) cold unsalted butter, cut into pieces


In your food processor or kitchenaid, place the flour, sugar, and salt to combine. Add the butter and mix/pulse until the pastry starts to come together and form clumps.

Place the pastry in the prepared tart pan(s) and, using your fingertips, evenly press the pastry onto the bottom and up the sides of the pan.
 
 Be sure to pierce the bottom of the crust with the tines of a fork. This will prevent the pastry crust from puffing up while it bakes. Cover and place the pastry crust in the freezer for 15 minutes to chill. This will help prevent the crust from shrinking while it bakes.
Preheat oven to temperature to 350 degrees (177 degrees C).

When the pastry is completely chilled, place the tart pan on a larger baking pan and bake until the crust is golden brown, about 13 - 15 minutes. Remove from oven and place on a wire rack to cool while you make the filling.


For Lemon Curd:

3 large eggs


1/3 cup (80 ml) fresh lemon juice (2-3 lemons) (do not use the bottled lemon juice)

3/4 cup (150 grams) granulated white sugar

4 tablespoons (56 grams) unsalted butter, at room temperature and cut into small pieces

1 tablespoon (4 grams) lemon zest(The yellow outer skin of the lemon)

In a stainless steel bowl placed over a saucepan of simmering water, whisk together the eggs, sugar, and lemon juice until blended. Cook, whisking or stirring constantly (to prevent it from curdling), until the mixture becomes pale in color and quite thick (like a hollandaise sauce or sour cream) (160 degrees F or 71 degrees C on a thermometer). This will take about 10 minutes.


 Remove from heat and immediately pour through a fine strainer to remove any lumps. Cut the butter into small pieces and whisk into the mixture until the butter has melted. Add the lemon zest, cover, and let cool to room temperature before filling the pastry crust.


Note:  The lemon curd will continue to thicken as it cools.  Covering the lemon curd with plastic wrap prevents a skin from forming on the surface. 
Recipe adapted from Joy of baking and foodnetwork.com

Note:  Room temperature lemons provide more juice. After squeezing, strain the juice to remove any pulp. Zest is the yellow, sweet-flavored outer rind of the lemon. A zester or fine grater can be used to remove the rind. Cold lemons are much easier to grate. Grate lemons just before using as the zest will lose moisture if it sits too long.

Thursday, March 24, 2011

Spring is in the Air

Just not quite in NYC yet....

Sad, but true!  It snowed the 1st day of spring here in NYC!  And when we woke up this morning there was a nice fresh 2 inches of snow on the ground.

There is a ray of hope however....
I am super excited because an awesome friend of mine from back home (yes sunny California) has put together a seedling swap!  What an awesome idea, right?  I think it will be great to at least grow a few herbs right on my windowsill. 

Since I won't be there with everyone else in SoCal, I am thinking that maybe I can put a little something together here in the city.  That way i can have a little support :) 

Not sure if we'll be able to start as soon as everyone else
nonetheless I have my seeds and I'm ready to go!
 Thanks again Y!!! 

Tuesday, March 22, 2011

Think


Gilead Grad this past weekend was phenomenal!  Uplifting, encouraging and thought provoking!  There was one thought in particular that has stuck with me (and I hope it sticks with me for many, many years to come), it involved one key to happiness and remaining successful in our "assignments."
"Don't become the thing you hate"
Now, I have heard the expression before, but this day it has taken a whole new meaning for me.  It was mentioned that of course there are some things that a person may do that you just can't stand.  For example: I hate that they never respond or acknowledge me when I speak to them (or whatever your poison may be) the point is, that negative type of thinking can become like an autoimmune disease.  That negative attitude begins to attack our own body (self worth, perception and view of one's self) so much so that it becomes self-destructive.  You may reason: I'm not gonna speak to them, because they NEVER speak to me.... 
We end up becoming or taking on the very traits that we loath!
It was urged for us to keep in mind that:

"We make a living by what we get, we make a life by what we give"
-Winston Churchill

Sunday, March 13, 2011

Mangú-licious Sunday Brunch

We decided that Brunch was in order since we had such a full day with all our guests and the hustle & bustle of Gilead Graduation Saturday!  There is a little Dominican place that we go to to get our normal "fix" but I had bought a few plantains earlier in the week and decided a nice meal was in order!  This is a hearty dish and is best when all the components are incorporated (tres golpes: fried cheese, fried salami/sausage, fried eggs :).


Any who have tasted it KNOW that it is finger-licking good!  This kept us going throughout the day and up until hospitality after the meeting around 4pm.


If you can find a market that has plentiful green plantains at a decent price,
it's worth giving it a try.  If you do, let me know how it turns out!


Easy Recipe:

Mangú
4 Green plantains
2 quarts water
1 1/2 tablespoon sea salt
2 tbsp canola oil
1 cup sliced white onion
  1. Peel the plantains and cut in half and then lengthwise (quarters).  Place the plantains, water and salt in a saucepan. Bring to a boil, and cook 20 minutes, until plantains are tender but slightly firm. Drain, reserving 1 cup of the liquid.
  2. Heat the olive oil in a skillet over medium heat, and saute the onion until tender.
  3. In a mixing bowl, mash/mix the plantains and slowly add the reserved liquid until desired consistancy is reached. 
  4. Serve the pureed plantain mixture topped with the onions, and a little dried oregano.

LinkWithin

Related Posts Plugin for WordPress, Blogger...